Imagine waking up on a groggy morning, eagerly reaching for your Keurig coffee maker, only to be met with frustration as nothing but a trickle of water emerges from the machine. A clogged Keurig can quickly turn your morning routine into a coffee conundrum, but fear not! In this comprehensive guide, How to unclog a Keurig coffee maker, we will equip you with the knowledge and techniques needed to effectively unclog your Keurig coffee maker and restore its brewing prowess.
Keurig coffee makers have revolutionized the way we indulge in our daily caffeine fix, offering convenience and quality in a single cup. However, with regular use, mineral deposits, coffee grounds, and other impurities can accumulate in the machine’s internal components, hindering the flow of water and compromising the brewing process. If left unattended, a clogged Keurig can lead to weak or inconsistent brews, prolonged brewing times, or even a complete standstill.
Why does the Keurig machine get stuck?
A Keurig machine can become stuck or experience operational issues due to a variety of factors. One common culprit is mineral buildup caused by hard water. Over time, minerals like calcium and magnesium can accumulate within the machine’s water reservoir, water lines, and puncture needle. This buildup restricts water flow, leading to slow brewing or a complete blockage.
Another reason for a stuck Keurig machine is the presence of coffee grounds or other debris. If these particles find their way into the water reservoir or puncture the needle, they can clog the system and impede water flow. This can occur when the K-Cup isn’t properly sealed or if the machine isn’t regularly cleaned.
Improper descaling or infrequent maintenance can also contribute to a stuck Keurig. Descaling is a crucial process that removes mineral deposits, and failure to perform it correctly or on a regular basis can result in congestion within the machine’s internal components.
In some cases, mechanical or electrical problems can be the cause. These issues may include malfunctioning motors, pumps, valves, or electronic sensors that regulate the brewing process. Professional repair or replacement of faulty components may be required to resolve these complex issues.
How to unclog a Keurig coffee maker – Step By Step
Is your beloved Keurig coffee maker not brewing properly? Are you experiencing a frustratingly slow water flow or even a complete blockage? Don’t worry, you can easily unclog your Keurig and get it back to brewing that perfect cup of coffee.
Step 1: Power Off and Empty
Start by turning off your Keurig and unplugging it from the power source. Remove any remaining K-Cups from the machine and empty the water reservoir.
Step 2: Clean the Exit Needle
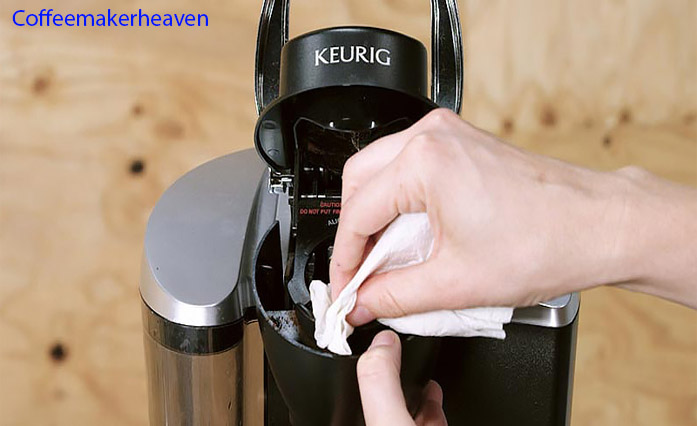
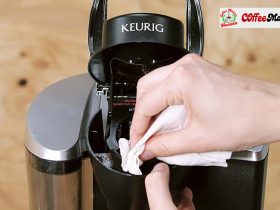
Locate the exit needle, which is the puncture needle where the K-Cup is placed. Take a paperclip or a Keurig-approved needle and gently insert it into the needle’s opening. Move it around to dislodge any clogs or debris that may be blocking the needle. Be cautious not to apply excessive force or damage the needle.
Step 3: Clean the Water Reservoir and Lid
Wash the water reservoir and its lid with warm, soapy water. Rinse them thoroughly to remove any residue or impurities that could be contributing to the clog.
Step 4: Descale (if needed)
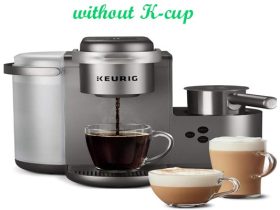
If your Keurig has been experiencing mineral buildup, it may require descaling. Follow the manufacturer’s instructions and use a descaling solution specifically designed for Keurig machines. Pour the solution into the water reservoir according to the recommended ratio, then fill the remaining space with clean water. Run the machine as if you were brewing a cup of coffee, but without inserting a K-Cup. Repeat this process a few times to ensure thorough descaling.
Step 5: Rinse and Reassemble
After descaling, rinse the water reservoir thoroughly to remove any remaining descaling solution. Reassemble the water reservoir, lid, and other removable parts, ensuring they are securely in place.
Step 6: Run a Water-only Brew Cycle
Fill the water reservoir with clean water and place a mug on the drip tray. Start a water-only brew cycle without inserting a K-Cup. This will help flush out any residual descaling solution or debris that might still be in the system.
Step 7: Test the Machine
Once the water-only brew cycle is complete, check if the Keurig is working properly. Ensure there is a steady flow of water and that the coffee brews as expected. If the clogging issue persists, consider repeating the cleaning process or seeking professional assistance.
By following these step-by-step instructions, you can effectively unclog your Keurig coffee maker and enjoy a delicious cup of coffee once again. Remember to clean and maintain your Keurig regularly to prevent future clogs and ensure optimal brewing performance. With a little care, your Keurig will continue to serve you the perfect cup of coffee day after day.
How to Keep Your Machine From Clogging
To keep your coffee machine from clogging, follow these tips: Firstly, use filtered water to reduce mineral buildup. Regularly clean and descale your machine as per the manufacturer’s instructions to remove mineral deposits and keep it running smoothly. Properly remove K-Cups to prevent coffee grounds from entering the machine. Check and clean the water reservoir regularly to remove any debris. Clear the needle to ensure unobstructed water flow. Avoid overfilling the water reservoir to prevent overflow and potential clogs. By following these preventative measures, you can maintain your machine’s performance, extend its lifespan, and enjoy a consistently satisfying cup of coffee.
Conclusion
In conclusion, a clogged Keurig coffee maker can be a frustrating obstacle to enjoying your favorite cup of coffee. However, by following the steps outlined in this guide and employing some preventive measures, you can effectively unclog your Keurig and restore it to optimal performance.
Regular maintenance, such as cleaning the exit needle, and water reservoir, and descaling when necessary, will help prevent clogs and keep your machine running smoothly. Taking care to remove K-Cups properly and using filtered water can also minimize the risk of clogging.
Frequently Asked Questions
How do you unclog a Keurig machine?
To unclog a Keurig machine, you can try these steps: 1) Power off and empty the machine. 2) Clean the exit needle with a paperclip or Keurig-approved needle. 3) Wash the water reservoir and lid. 4) Descale the machine if needed. 5) Run a water-only brew cycle. If the clog persists, repeat the steps or seek professional assistance.
Why is water not coming out of my Keurig?
If water is not coming out of your Keurig, it could be due to a clogged exit needle, mineral buildup, or a malfunctioning pump. Try cleaning the exit needle with a paperclip, descale the machine to remove mineral deposits, or ensure the water reservoir is properly seated. If the issue persists, it may require professional repair or contacting Keurig customer support.
How do you unclog a Keurig drain pipe?
To unclog a Keurig drain pipe, you can use a straightened paperclip or a small brush to gently remove any debris or clogs. Insert the tool into the drain pipe and carefully dislodge the blockage. Flush the pipe with water to ensure it is clear.






Leave a Reply